 This guide shows a Git WordPress workflow and demonstrates version control using Git from a local development environment on macOS to a staging site web server.
For the Database control and pushing to staging, we will use WP Migrate Pro.
A second remote repo for a production server would also need to be added in a real-world scenario. This guide just uses local and staging sites.
This guide uses CentOS as the staging server which comes with Git and you can install Git for macOS, an easy install method here.
The benefits of a Git workflow are numerous, including the ability to work local and sync your files in seconds to a remote repo.
Set up SSH (no passwords)
A key requisite for this is that you have SSH access to your website which in some shared hosting instances can be limited.
The biggest initial hurdle in getting the workflow going is to have passwordless SSH connection by transferring your locally generated public key into the authorized file of the remote server, once this is done and the connection works without passwords, you are good to go.
What part of the WordPress hierarchy will be under Version Control
In this guide, the whole WordPress installation inside the webroot; /public_html/ is going to be the example. This can be narrowed down to just the wp-content folder, or any particular directory you want under version control such as just the theme folder.
From start to finish projects I find doing the whole install easier to manage and a second git repo just for the theme. Git will be looking after the actual files, whereas WP Migrate Pro will be syncing the database.
Remote Server – Set Up Git Staging Repo
First thing is to set up the staging server repo, but do it outside of the webroot public_html one level above in the user home is good. This will contain the version control data and later we will push the actual source files to our WordPress install directory which will be known as the working directory. So SSH into your staging server and switch to home…
ssh [email protected]
If SSH is on a non-standard port:
ssh [email protected] -p2000
Move to the home directory
cd
Make a directory which will store our version control data and initialize it with a -bare option which will have no working directory. This is the way this needs to work and we will push the actual files to our working directory destination when we use the Git hooks.
mkdir wpstaging.git
cd wpstaging.git
git --bare init
This will eventually be our origin/master branch, you should be left with output like so
Initialized empty Git repository in /home/username/wpstaging.git/
Local Dev Set Up Git Repo
Now, lets set up a local Git repo and add the server repo as our remote repo. In this local example, the directory will be a local development site in WordPress which already has files already in it.
cd ~/Sites/wp2/public_html
git init
Add all the files to be tracked (or only the ones you want), the period will add all files or else use the filenames themselves to add instead of the period:
git add .
And commit all the files
git commit -m "first commit"
Check the status and we should have a clean directory
git status
# On branch master
 nothing to commit, working directory clean
Add the Remote to the Local Repo
Still on the local environment, time to add the remote repo.
We will set up the remote repo branch as ‘staging‘. Our local repo is master.
git remote add staging ssh://[email protected]:/home/username/wpstaging.git
Or non-standard port
git remote add staging ssh://[email protected]:2000/home/username/wpstaging.git
I found that for cPanel/CentOS when creating the remote you need to prefix the address with the ssh:// protocol.
Now push our files and version control data up from our local master branch to our remote staging branch, this will take time depending on the size of the site.
git push staging master
You can check the remote URL repo by running
git remote show staging
Pushing the Server Repo to our Working Directory with Git Hooks
SSH back into your server and the actual working directory will be the webroot likely either public_html or htdocs
~/public_html
Move to your staging repo and change directory into the hooks directory
cd ~/wpstaging.git/hooks
Make a new post-receive hook this hook will action once a remote repo has pushed to it, in other words, once our local repo has pushed data to it it will execute the action inside – which is to move our latest tracked files to their destination, our webroot working directory.
nano post-receive
Add
#!/bin/sh
git --work-tree=/home/username/public_html  --git-dir=/home/username/wpstaging.git checkout -f
So here we are declaring the actual working directory and where the data is coming from. Save the file and make it executable
chmod +x post-receive
Test a commit and push back on your Local Repo
First set the remote staging repo as the upstream master, so when we use git push it will always go to the staging repo
git push --set-upstream staging master
Make a change to the WordPress theme and commit it
git commit -am "first edit"
Then push it to the remote server
git push
You should see along the lines of
To ssh://[email protected]/home/username/wptheme.git
   88003b9..600c2ef  master -> master
Check your working directory on the remote server and you should see your WordPress Theme.
Now all changes made locally will be pushed and tracked from local to remote.
But what about the database

So far then all the files will have pushed to the webroot but there will be no site as there is no database. This is where WP Migrate Pro comes in. The first thing to do is create an empty database on the staging site and import the local database.
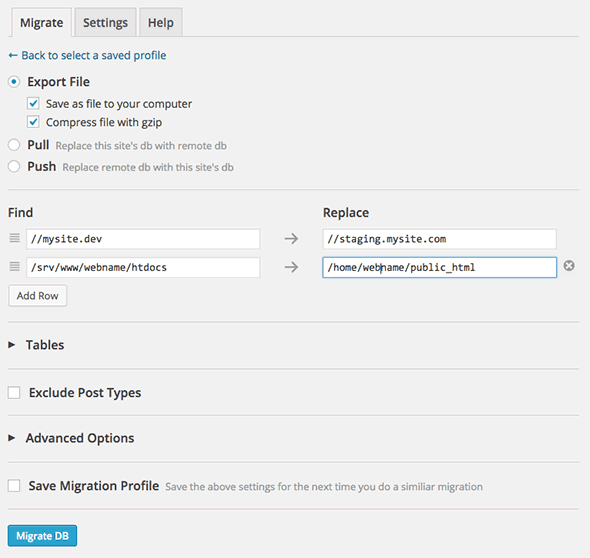
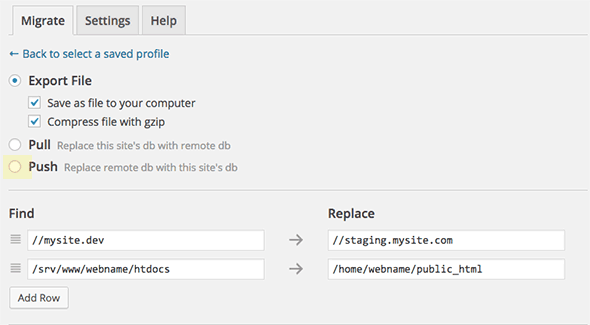
So in the local dev environment migrate and save the local db with the correct staging name and URL, then import this db into the staging environment through phpMyadmin or Sequel Pro.
wp-config.php issues :(
Before you can login you will need to adjust the staging db name and password in wp-config.php as it will have received the local db credentials which may have been different.
For a more seamless workflow set the local dev database name/password to be strong and just use the same in the staging environment. If you do want them with separate credentials you could create a .gitignore file on the local dev and ignore wp-config.php – and if you have already started tracking it you can untrack it with
git rm --cached wp-config.phpSo now you can use a separate config for both local and staging
Setting up WP Migrate DB Pro on the Staging Server
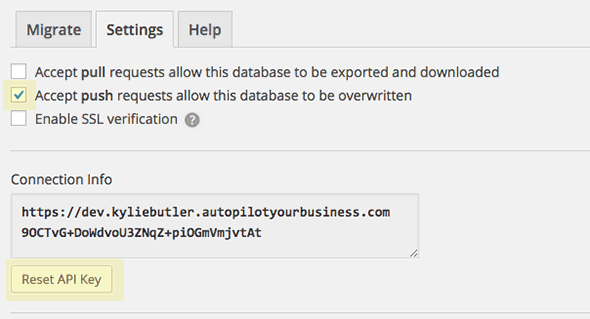
So in the staging server WordPress install set up WP Migrate Pro by first of all resetting the API key and enabling the Accept push requests to allow the db to be overwritten – then copy the connection info as this will be added to the local dev install.
Setting up WP Migrate DB Pro on the Local Server
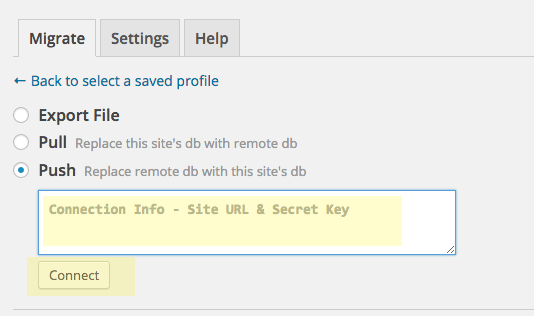
Once the connection is made it will bring in the connection details, WP Migrate Pro will attempt to connect via SSL and if it can’t it will generate a warning about going over http. No biggie.
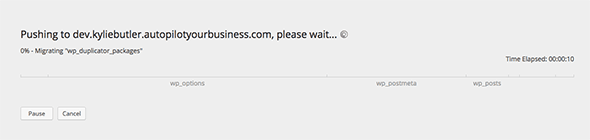
So when you need to update the database from local to staging in Migrate Pro select your profile and migrate.
Cloning the Remote Repo
You or others can clone the remote repo using the git clone and – in this instance…
git clone ssh://[email protected]/home/username/wpstage.git
Once you have got your head around how it works you can also add in a 3rd production Git repo to the workflow by adding in an additional profile in WP Migrate Pro and a second remote branch in Git with a corresponding post-receive hook and add this as a branch to the local repo, when you want to push to the Production Repo just change the branch name when using git push


9 comments
whgandalf
The hook is not working on my tests, I followed every single line, but I am afraid that something is missing, is anyone having the same problem ?
Shannon Whitty
I followed this guide word for word. Got it all setup and then added a new file, committed it and pushed to my staging remote:
$ git push staging staging
[email protected]‘s password:
Enumerating objects: 3, done.
Counting objects: 100% (3/3), done.
Delta compression using up to 8 threads
Compressing objects: 100% (2/2), done.
Writing objects: 100% (2/2), 226 bytes | 226.00 KiB/s, done.
Total 2 (delta 1), reused 0 (delta 0), pack-reused 0
To ssh://xxx.xxx.xxx.xxx/home/user/git/project.git
a1b8af3..6ad47cc staging -> staging
Appears to have worked… But the file I added is not on the server… Now I don’t know where to look or what to do to debug?
Hen V
Confused at the DB part. If I just have wp files in staging and no DB, how do I even install a plugin to import a DB if the site won’t even load? Would I need to setup WP on staging by creating a DB through cpanel, phpmyadmin, wp-cli, or mysql command line? Then configure wp-config.php temporarily. After that install the plugin, then push from local to staging? Is this correct?
Greg Bell
For maximum goodness, of course, use git hooks and wp-cli with WP Migrate to push the db at the same time you run git stuff. Slick, but that’s a lot of stuff to break.
Only problem with this setup is that my clients add content once I push to staging. I need to be able to ssh in to the server, commit their changes and pull/merge/push them back to my dev environment.
hetjan
How would you go about adapting this so that it’ll check for changes in the webfolder–and commit them–so that you can keep track of changes made to the webfolder?
Neil Gee
Not too sure I follow – You have to make the commits
Gerschel
I believe what he was asking for is information on how to continue development after a site goes live. I’m searching for this information myself.
I have a site that I put up recently. I have some content on there at this point. I went into the theme that closely resembled what I was after but not quite it, and made some modifications.
There is this other theme I was wanting to try out, but it clashes with one plugin I’m using.
Since my site is now live, I’m wanting to make some theme changes and test out plugin compatibility locally. Meanwhile, changes do occur on the live site. Once my local changes are ready, how do you sync the database and other site details without overwriting, but also let what was done locally make their appropriate overwrites.
The difficulty is not knowing how to tell what was changed, what to include or exclude, and when to include or exclude, i.e. include for initial commit, but create a .gitignore for such files in these situations.
James
For Centos 7, no need to add the ssh:// for the remote url. [email protected]:/home/username/wpstaging.git should work fine.
Neil Gee
Good to know, my current OS is CentOS 6.6