ServerPilots‘ free plan does not offer SSL certs from Lets Encrypt, it is only available on the paid plans, here is a guide below that can allow you to install and renew the SSL certs with a custom script.
You need to be comfortable in the command line and be aware that ServerPilot will not offer support if you run into trouble, I personally would only use this technique for non-client work such as personal or development staging sites.
For servers I typically use Vultr for my server deployment but the technique will work equally as well on Digital Ocean or Linode instances.
There are a couple of scripts available on how to install and renew the Lets Encrypt SSL certs on Github, of note the 2 main ones are:
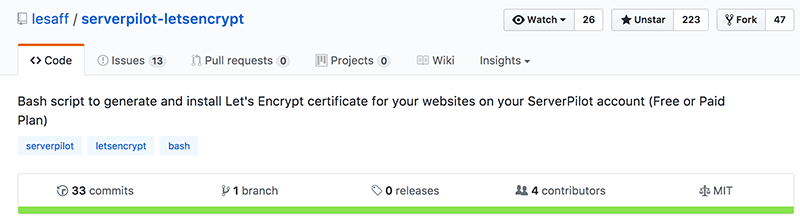
Of the two mentioned above I would recommend lesaff’s one, it has over 200 stars and 4 contributors and one that I have used a number of times.
Prior to using the script you need to ensure that the domains you need SSL Certs for have correct nameserver settings pointing the A record of the domain to your servers IP address, to double check use an online tool like whatmydns.
Once your DNS is correct, ssh into your server as root, you should be already in roots’ home directory if not just enter cd to go there. Here you can clone the github repo by entering…
git clone https://github.com/lesaff/serverpilot-letsencrypt.git
This will add the serverpilot-letsencrypt directory containing the needed script sple.sh.
Copy this script to the executable path /usr/local/bin
cp serverpilot-letsencrypt/sple.sh /usr/local/bin
Make the script executable, so you can run it in any location on the server.
chmod +x /usr/local/bin/sple.sh
To run the script just enter..
sple.sh
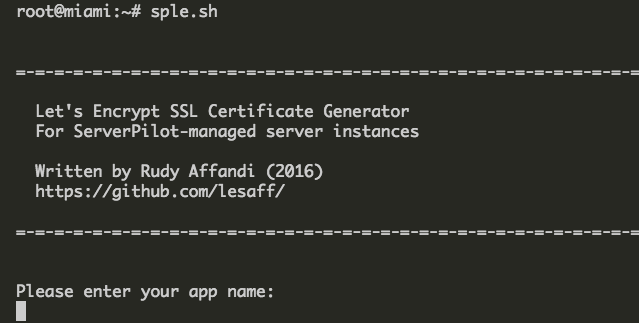
You will be asked to enter your app name, which is the name you added in serverpilot when setting up, the example below uses ‘piwik‘.
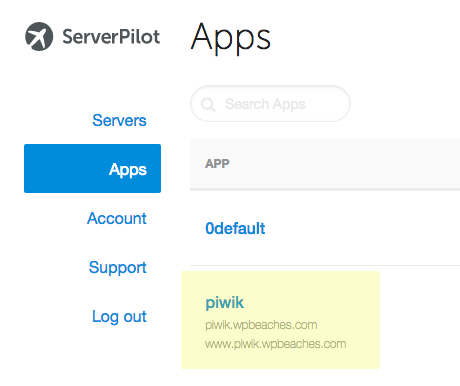
Once you enter the app name you then add the System User name, since you are using the free ServerPilot plan the only username is serverpilot so that is what you enter here.
The final set up question is to add the domain names which you add space separated, the example here uses just piwik.wpbeaches.com
Now you will see an agreement screen and email field for domain verification, next the SSL certs are installed and you will be left with output similar to below.
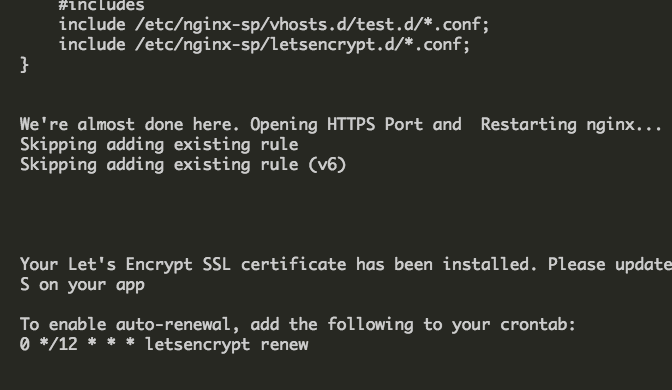
Setting up AutoRenewal for Lets Encrypt SSL Certs
With the SSL Certs installed the next thing is to set up autorenewal of them which can be done setting up a cron job via your crontab, open you crontab with …
crontab -e
If it’s your first time opening the crontab you will be prompted which text editor to use, the default suggestion of nano is fine, at the end of the commented lines add the following line… and save with ‘control’ + O and exit with ‘control’ + X
0 */12 * * * letsencrypt renew && service nginx-sp reload
The above cron command is for ServerPilots recommended Ubuntu distribution 16.04 – if you are using 14.04 version the command is different as below.
0 */12 * * * /usr/local/bin/certbot-auto renew --quiet --no-self-upgrade --post-hook "service nginx-sp reload"
Now the SSL Certs will autorenew.
When it doesn’t work
Of course things might go wrong, and if they do as suggested by the Github page you most probably need to remove the offending SSL that was just added.
cd /etc/nginx-sp/vhosts.d
and remove the offending .ssl.conf file.
root@miami:~# cd /etc/nginx-sp/vhosts.d
 root@miami:/etc/nginx-sp/vhosts.d# ls -la
 total 44
 drwxr-xr-x 5 root root 4096 Sep 3 00:10 .
 drwxr-xr-x+ 8 root root 4096 Sep 1 05:24 ..
 -rw-r--r-- 1 root root 957 Sep 1 07:56 0default.conf
 drwx--x--x 2 root root 4096 Sep 1 07:56 0default.d
 -rw-r--r-- 1 root root 1895 Sep 1 08:07 0default.ssl.conf
 -rw-r--r-- 1 root root 1020 Sep 1 05:07 piwik.conf
 drwx--x--x 2 root root 4096 Sep 1 05:07 piwik.d
 -rw-r--r-- 1 root root 1877 Sep 3 00:05 piwik.ssl.conf
 -rw-r--r-- 1 root root 1011 Sep 3 00:07 test.conf
 drwx--x--x 2 root root 4096 Sep 3 00:07 test.d
 -rw-r--r-- 1 root root 1867 Sep 3 00:10 test.ssl.conf
So in the case above if I just added the piwik.ssl.conf file that is the one to remove.
Remove it by adding (your *.ssl.conf name…)
rm piwik.ssl.conf
Important – after removing the file restart nginx by issuing the command…
sudo service nginx-sp restart
For more information on why it went wrong check /var/log/letsencrypt for more information, rectify the issue and try again.
cat /var/log/letsencrypt/letsencrypt.log
Forcing Pages to Redirect to SSL
Once everything works you can force all pages to redirect to SSL connections by adding a snippet to .htaccess in your webroot directory
RewriteCond %{HTTP:X-Forwarded-Proto} !=https
RewriteRule .* https://%{HTTP_HOST}%{REQUEST_URI} [R=301,L]
To go through other issues regarding making your site all out SSL, check out WordPress HTTPS considerations issues here.
That’s it, the script is solid and works well.


13 comments
JoJo
What happens if the connection is not fully secured?
Thanks!
Neil Gowran
Nothing happens as such – you just have source files to http – but the SSL and https are still working correctly. TO be fully compliant you need to swap those http refs to https.
YA
Hello, I’m a newbie hosting several WordPress websites on a VPS using serverpilot, and I followed your instructions and installed Let’s Encrypt SSL on one of the apps. There was no error when I used your script. But afterwards I can’t access this app or the other apps on that VPS using HTTP or HTTPS.
I haven’t changed the .htaccess file though (haven’t read that far, I thought it was done after adding the cronjob). I panicked and then followed your instructions and removed the ssl.conf file and everything went back to normal… Will changing the .htaccess file solve my problem? Thanks!
Jai
I’ve tried this with serveral different serverpilot apps, keep running into the same error Job for nginx-sp.service failed because the control process exited with error code.
Looking in the log it says it failed to start nginx-sp, any clue why that would happen?
Thank you
Bart
When trying to clone the github repo I get:
Permission denied (publickey).
fatal: Could not read from remote repository.
Please make sure you have the correct access rights
and the repository exists.
Neil Gowran
I have updated the tutorial to use ‘https’ as the protocol instead of ‘ssh’ – it was because you didn’t have an authenticated key with Github – using ‘https’ it doesn’t matter.
Mahesh
LetsEncrypt now supports wildcard SSL, could you please update this article ?
Neil Gowran
New code for the script is not released yet
Wadim
Please, let me know when script will be updated with wildcard SSL support. Thank you.
Ankur
Can I use it along with Cloudflare?
Neil Gowran
Yes
Achintha
There is a mistake on statement which is setting up the permissions.
chown +x /usr/local/bin/sple.sh
should be
chmod +x /usr/local/bin/sple.sh
Thanks for the article.
Neil Gowran
Thanks – article updated