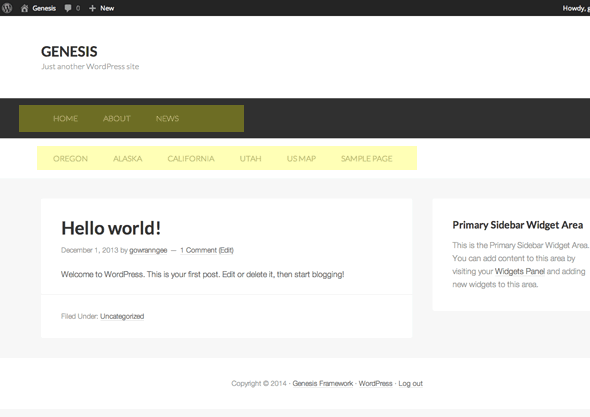
Genesis comes with 2 menus ready to go, the Primary and Secondary menus, by default these sit on top of one another in the framework and Genesis Sample theme:
This tutorial takes you through how to make a third menu and place it in the footer; The Footer Menu. Although you can use this as a guide to create any type of menu and position it accordingly.
First thing to do is to have your genesis child theme already created and get ready to add some code into your functions.php file in your theme directory.
Creating the Footer Function
First up is to create a new function, name it something unique, and prefix the function with your theme name – in this example the function is named genesischild_footer_menu.
What is added in the function is the HTML markup which includes a parent containing div to control fullwidth with a CSS class of .themeprefix-menu-container.
Then in the array are values of accepted arguments for the menu, this includes:
- The theme location to register in the theme.
- The containing HTML element which if using HTML5 it makes senese to use nav.
- The containing CSS class has been set to .wrap so the content sits centred.
- CSS Genesis menu classes; ‘menu‘ and ‘genesis-nav-menu‘, this will give our new menu some default styling. A third unique CSS class has also been added ‘menu-tertiary‘, you can name this whatever you like, this gives us a CSS class name to target and change the styling.
- A depth level for multi-level navigation, since this is a footer menu, I have set it to 1.
//Footer Menu
function themprefix_footer_menu () {
 echo '<div class="footer-menu-container">';

 $args = array(
 'theme_location' => 'tertiary',
 'container' => 'nav',
 'container_class' => 'wrap',
 'menu_class' => 'menu genesis-nav-menu menu-tertiary',
 'depth' => 1,
 );
 wp_nav_menu( $args );

 echo '</div>';
}
If for some reason you wanted the footer menu to display dropdowns you would change the depth value from 1 to 0.
Further arguments and values can be added to the array.
Adding the Menus into the Backend
Next up is to add this new function into the backend – which is done via a hook, so still in the functions.php file this needs to be added:
add_theme_support ( 'genesis-menus' , array ( 'primary' => 'Primary Navigation Menu' , 'secondary' => 'Secondary Navigation Menu' ,'tertiary' => 'Footer Navigation Menu' ) );
This essentially adds in 3 menus including the new Footer Menu, now if you look in WordPress dashboard in Menus in locations you will see all three locations.
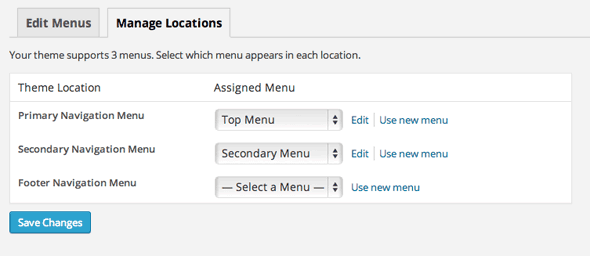 So here you can already assign a created menu.
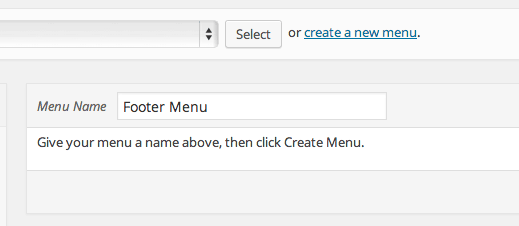 Or just create a new menu
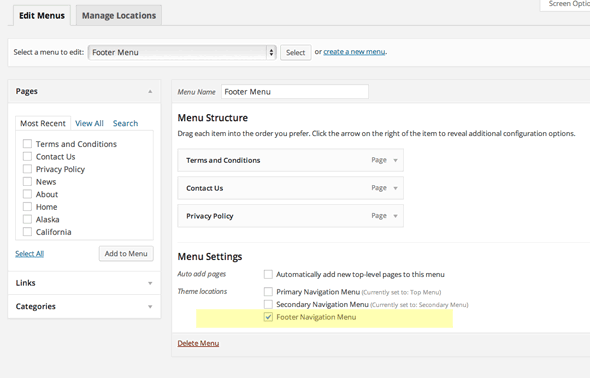 When created, assign the pages and set the Theme Location, here the new menu is assigned to the footer menu.
Positioning The Menu in the Front End via a Hook
One last thing to do is to position the new menu which Genesis provides a number of options. Add in this code also to the functions.php file:
add_action('genesis_before_footer', 'themprefix_footer_menu');The first part of the code is the Genesis location hook, followed by the function that we created earlier.
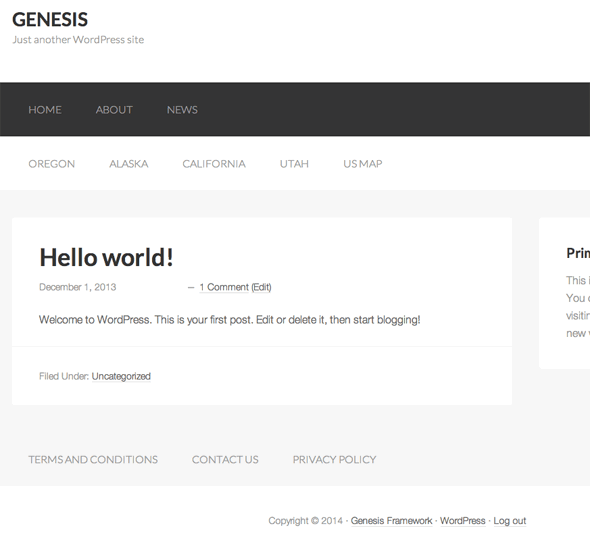
This will position the menu like so…
You can position the menu elsewhere by changing the hook location – a very handy visual guide plugin of hook locations is here.
So the final code needed in the functions.php file to create and position this menu is:
To uniquely style the new menu, just use the .menu-tertiary class and make some CSS changes in the style.css file.
Slight difference in the gist above is that I had added the .wrap CSS class alongside the other Menu CSS classes and removed the echo’ed div container and put that container class as a value for the argument container_class, using either way will be fine, this way just uses less markup.


10 comments
Rantu Nath
Sir, I used Megazine pro theme, But I can’t edit or put my Menu in Footer area please give some suggestion please sir.
Estoz Khattak
The Footer menu is not showing up but when The cursor is hovered on them, they show up! How to change this?
Thanks for writing this code!
Neil Gowran
Probably a CSS fix
JOhn
HI there,
I tried this using the Prose theme but nothing happened. When I add the menu code to the back end, nothing happens.
I add it via the Genesis/Custom Code/Custom Functions.
No third menu option appears.
Do you have any advice for this problem?
Cheers
Neil Gee
Hi, I tested it on Prose and you are right nothing happened when it is pasted in Custom Functions (i’ve not used Prose before) – but if you add it via the themes functions.php it will work, make sure to add both the function and theme support snippets.
Carl
Great code, I was able to move the menu with the hook’s guide. Thanks.
Quick question, I tried a multitude of variants to center and format the menu:
.genesis-nav-menu .menu-tertiary {
color: #333;
font-size: 44px;
}
It just doesn’t change.
I also tried:
.menu-tertiary {
color: #333;
font-size: 44px;
}
I am placing this in stylesheet.css – is there something missing? Thanks
Gia
This is GREAT! I have it working perfectly. I’m wondering if there’s a way to change the class in order to have separate styling? I’d like my tertiary nav menu to be smaller than my main nav menu. Thank you!
Neil Gee
There is a unique CSS class in the gist above
.menu-tertiary
Mark
This was very helpful. :)
NDF
Could you please add your CSS code?