Most Genesis themes including the framework/sample theme come with a ‘header right‘ widget area which solves most header layouts, however there are times when an additional header middle widget area may come in handy, in particular for 3 distinct content blocks that requires a client when handing over, have to manage the content.
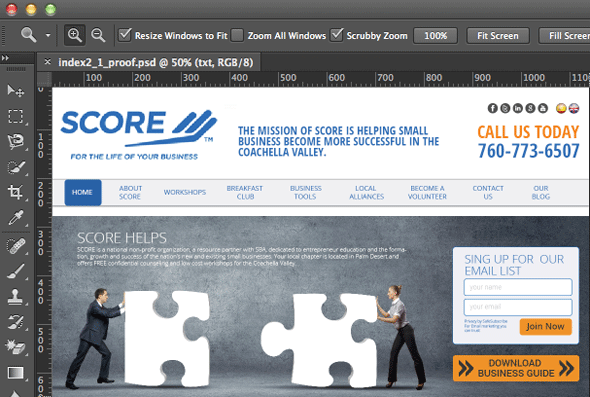
In the layout above you can use the header right widget area to get the job done but a number of CSS rules with floats need to be added and at various media query sizes, instead we could add in an additional header middle widget area to control the middle company statement. The header-right would accommodate the social media menu and contact info and the .title-area div would on the left would take care of the logo.
First thing we need to do is register the new header middle widget.
Register the Widget Area
add_action( 'widgets_init', 'genesischild_extra_widgets' );
//Register in new Widget areas
function genesischild_extra_widgets() {
genesis_register_sidebar( array(
'id' => 'header-middle',
'name' => __( 'Header Middle', 'genesischild' ),
'description' => __( 'This is the Header Middle area', 'genesischild' ),
) );
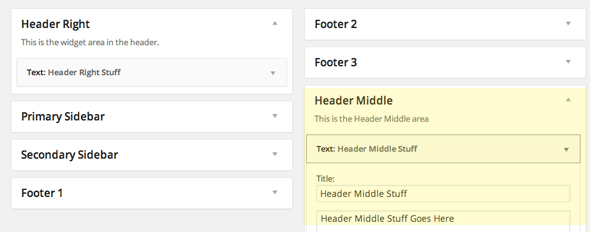
}In your functions.php file, register the new widget area, in the above mark up I have given an id of header-middle, this will now appear in the widget area in the WordPress Dashboard>Appearance>Widgets.
Copy Genesis Header Mark-up
To position the new widget area in the header we need to recreate the original header and slot the new header-middle area in before the header-right area. The original Genesis header mark up can be found in the framework in /Lib/Structure/header.php between lines 885-915.
function genesis_do_header() {

 global $wp_registered_sidebars;

 genesis_markup( array(
 'html5' => '<div %s>',
 'xhtml' => '<div id="title-area">',
 'context' => 'title-area',
 ) );
 do_action( 'genesis_site_title' );
 do_action( 'genesis_site_description' );
 echo '</div>';

 if ( ( isset( $wp_registered_sidebars['header-right'] ) && is_active_sidebar( 'header-right' ) ) || has_action( 'genesis_header_right' ) ) {

 genesis_markup( array(
 'html5' => '<div %s>' . genesis_sidebar_title( 'header-right' ),
 'xhtml' => '<div class="widget-area header-widget-area">',
 'context' => 'header-widget-area',
 ) );

 do_action( 'genesis_header_right' );
 add_filter( 'wp_nav_menu_args', 'genesis_header_menu_args' );
 add_filter( 'wp_nav_menu', 'genesis_header_menu_wrap' );
 dynamic_sidebar( 'header-right' );
 remove_filter( 'wp_nav_menu_args', 'genesis_header_menu_args' );
 remove_filter( 'wp_nav_menu', 'genesis_header_menu_wrap' );

 echo '</div>';

 }
Copy this code out and paste it your functions.php file and now we need to edit it and add the new header-middle widget area.
Add in New Genesis Middle Header Widget
remove_action( 'genesis_header','genesis_do_header' );
add_action( 'genesis_header', 'themeprefix_genesis_do_header' );
//Add in the new header with the middle widget header
function themeprefix_genesis_do_header() {

 global $wp_registered_sidebars;

 genesis_markup( array(
 'html5' => '<div %s>',
 'xhtml' => '<div id="title-area">',
 'context' => 'title-area',
 ) );
 do_action( 'genesis_site_title' );
 do_action( 'genesis_site_description' );
 echo '</div>';


	genesis_widget_area( 'header-middle', array(
	'before' => '<div class="header-middle widget-area">',
	'after'  => '</div>',
	) );


	if ( ( isset( $wp_registered_sidebars['header-right'] ) && is_active_sidebar( 'header-right' ) ) || has_action( 'genesis_header_right' ) ) {

 genesis_markup( array(
 'html5' => '<div %s>' . genesis_sidebar_title( 'header-right' ),
 'xhtml' => '<div class="widget-area header-widget-area">',
 'context' => 'header-widget-area',
 ) );

 do_action( 'genesis_header_right' );
 add_filter( 'wp_nav_menu_args', 'genesis_header_menu_args' );
 add_filter( 'wp_nav_menu', 'genesis_header_menu_wrap' );
 dynamic_sidebar( 'header-right' );
 remove_filter( 'wp_nav_menu_args', 'genesis_header_menu_args' );
 remove_filter( 'wp_nav_menu', 'genesis_header_menu_wrap' );

 echo '</div>';

 }

}
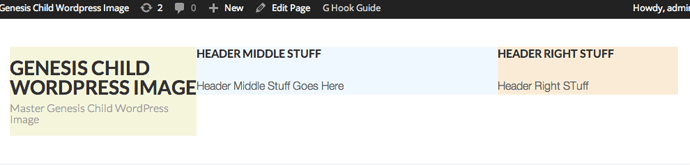
So in the adjusted code above, the new widget area is positioned just before the header-right. The new header-middle widget has 3 CSS classes assigned, two of them are common with the header-right area and one is unique to itself .header-middle
At the bottom of the code there are 2 actions, the first one removes the old header and the second one adds in the new header with the new widget included.
Also the new header function has to have a unique name.
Another way to do this could have been to add a new action to the code and then position the widget to that action hook, benefit of that is you could hook in more content – but for this particular example I am just adding the widget straight into the header mark up – if the widget is empty, no code will be output.
CSS Adjustment
Some CSS refinement is needed to make the 2 header widget areas sit side by side. This needs to be added to your style.css
/*
 *Edit Alignment and percentage values to suit, add in CSS attributes like padding
 */

 .site-header .title-area {
 width:25%;
}

.site-header .header-middle {
 width:25%;
 text-align: center;
 float: left;
}

.site-header .header-widget-area {
 width:50%;
}


@media only screen and (max-width: 767px) {

 .site-header .title-area,
 .site-header .header-middle,
 .site-header .header-widget-area {
 width:100%;
}
I have chosen here to use percentage based widths, with the sum of the 3 header areas .title-area, .header-middle and .header-widget-area equal to 100%
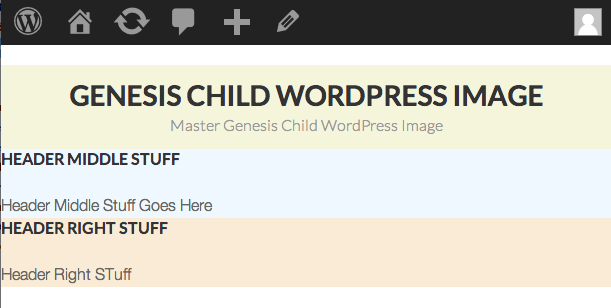
The widths are set to retain their alignment and proportions down to 768px and then stack ontop of each other below that viewport size. The percentage of these elments widths will be determined by the design and other design attributes such as padding need to be added.
Thats it, thats how you can work an additional widgetised area into the header.


5 comments
Gabriel
Great tutorial. My question now is, for some reason the widget content isn’t showing. When I inspect, I can clearly see that the widget is there but when I add content to it, it doesn’t show up.
Derek
Thanks for the tutorial – this is a really useful addition to Genesis. I’ve just set it up and the middle widget area works fine, but as when I add anything (even an empty text widget) to the header right, I lose all content on the page after the middle widget. Any clues on where I might have gone wrong?
Thanks,
Derek
abbeyj
Thank you for this tutorial. I am working on my first site with Genesis using the Eleven40-Pro that has a fixed header with logo left/menu right. I have set up the new widget area with your instructions but it first appeared stacked on top of the menu. I changed width of the original (menu) widget area from 800px to 350px which then put everything back in line; however, the menu is now floating middle with the new widget floating right. I have confirmed in styles.css that the menu is set to float right so I’m not sure what the issue is. Is there any chance you may have insight on what the fix is or what I should look for? Thank you in advance and thank you again for these instructions.
Alexandra
I just completed the Middle Header Widget tutorial, and I’ve ended up with two headers – the new one with the middle widget, and the old header below it. What did I do wrong?
Neil Gowran
It may be because the header is hooked in somewhere else in your theme, this example expects the header to be hooked in at genesis_header which is being removed.
If you look at your themes’ function.php for genesis_do_header see it it’s using a different hook and then remove that instead.