Here is how to add a Data Attribute to a Menu List Item via the Walker Menu Class. Some of the markup of the WordPress menu is hard to filter or hook into, the Walker class allows for a full custom menu mark up.
One request I find is to add a data attribute to the list item itself, instead of the link tag <a> which can be accomplished using nav_menu_link_attributes , for the <li> item you will need to create a whole new menu using the Walker Menu Class.
Register and Position a New Menu
First up is to register a new menu and link it to an instance of the Walker Class
So in the above gist I am registering a new menu with wp_nav_menu with a theme location of tertiary, adding support for it with add_theme_support as I am using Genesis and also positioning it before the loop with an action.
Notice in the $args for wp_nav_menu I am giving a value to ‘walker’ – this is the new instance of the walker class named WPB_Custom _Walker
Making a New Walker Class Instance
Make a copy of class Walker_Nav_Menu from the original /wp-includes/class-walker-nav-menu.php – here I have added it to my theme’s /inc directory and named it custom-walker.php Make sure you change the class name from the original in the file, my one starts – class WPB_Custom_Walker extends Walker
In essence now the new menu will follow the new walker instance so you can alter the output in custom-walker.php which will reflect on the rendered output on the new menu.
Adding Custom Fields for Data Attributes
There is a great library that allows us to add custom fields to the menu items in the backend of WordPress, which we then can output in our custom-walker.php file.
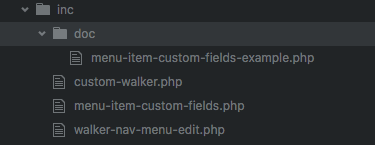
The library is here. Download it and extract the files in the screen grab, remember we already have custom-walker.php and add into your themes /inc folder and bring in one of them to your functions.php file.

Bring in menu-item-custom-fields.php into functions.php
require_once dirname( __FILE__ ) . '/inc/menu-item-custom-fields.php';
This file menu-item-custom-fields.php in turn references the other walker-nav-menu-edit.php and the file in the doc directory – walker-nav-menu-edit.php gives us our sample custom fields which need to be copied and added to functions.php
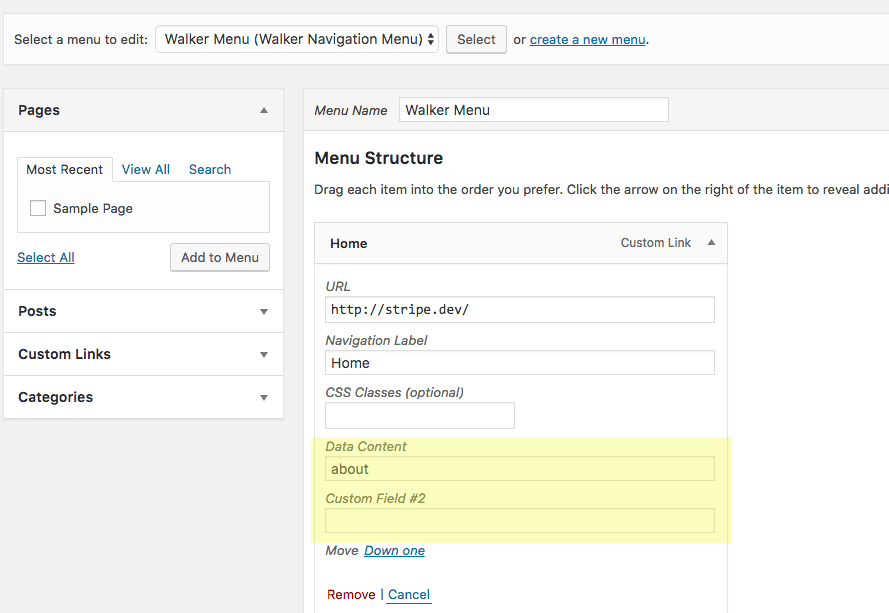
So in the above I have added one new specific field and left the other one at the default text…
self::$fields = array(
 'field_description' => __( 'Data Content', 'menu-item-custom-fields-example' ),
 'field_02' => __( 'Custom Field #2', 'menu-item-custom-fields-example' ),
 );
I have also changed any text from menu-item-%s to _menu_item_%s in the function _save and function_fields
This is then ready in the admin backend…

Output in the Front End Markup
Final thing is to retrieve the field with get_post_meta in the custom-walker.php file
$item->datacontent = get_post_meta( $item->ID, '_menu_item_field_description', true );
Then call it in the <li> item
$output .= $indent . '<li' . $attributes . $id . $class_names . 'data-content="' . $item->datacontent . '">';
custom-walker.php with custom field added at line 81 and called in the output at line 123

Mammoth task complete! – In some instances you may just want to add a jQuery fix but in others you may need the attribute value to change by the end user in which case you’ll need a custom solution.


1 comment
dan
HI, Am trying to follow this but i can not see the custom fields in the backend, they are showing under ‘screen options’ just not the fields on the menu items?
any idea why its not showing could be cos of the latest version of WP ?