The 7G WAF firewall by Jeff Starr at Perishable Press is a great addition for server level WAF protection, here is a guide on how to add it to CloudPanel‘s NGINX stack.
Download the 7G WAF NGNIX version
Download the 7G WAF or from the origin page here.
Extract the archive and find the 2 files:
7g-firewall.conf
7g.conf
Install to CloudPanel
SSH into your CloudPanel instance as root and navigate to the NGINX conf directory and add the two 7G files:
cd /etc/nginx/conf.d
Directory structure ends up like the below:
root@oram1:/etc/nginx/conf.d# ls -lah
total 24K
drwxr-xr-x  2 root root 4.0K Jul  6 14:44 .
drwx------ 12 root root 4.0K Jul  1 12:45 ..
-rw-rw-r--  1 root root 1.4K Jul  6 14:44 7g.conf
-rw-rw-r--  1 root root 8.3K Jul  6 14:43 7g-firewall.conf
Include 7g-firewall.conf to NGINX
Next is to include the 7g-firewall.conf into the main nginx.conf, open the nginx.conf file.
Make a back up first:
cp /etc/nginx/nginx.conf /etc/nginx/nginx.conf.bak
Then edit the file:
nano /etc/nginx/nginx.conf
Add in the http block before the closing bracket at end of file:
    ##
    # 7G WAF
    ##

    include /etc/nginx/conf.d/7g-firewall.conf;
Save and close your file – check your syntax:
nginx -t
Install to specific websites in CloudPanel
Now the main 7G WAF is in place we can now add the 7g.conf file to specific websites which you can do via CloudPanel > Sites > Manage > Vhost
If desired make a copy/paste of the Vhost as a back up.
( You can also do this via the command line to the correct Vhost file at /etc/nginx/sites-enabled/ )
Add to the server block:
include /etc/nginx/conf.d/7g.conf;
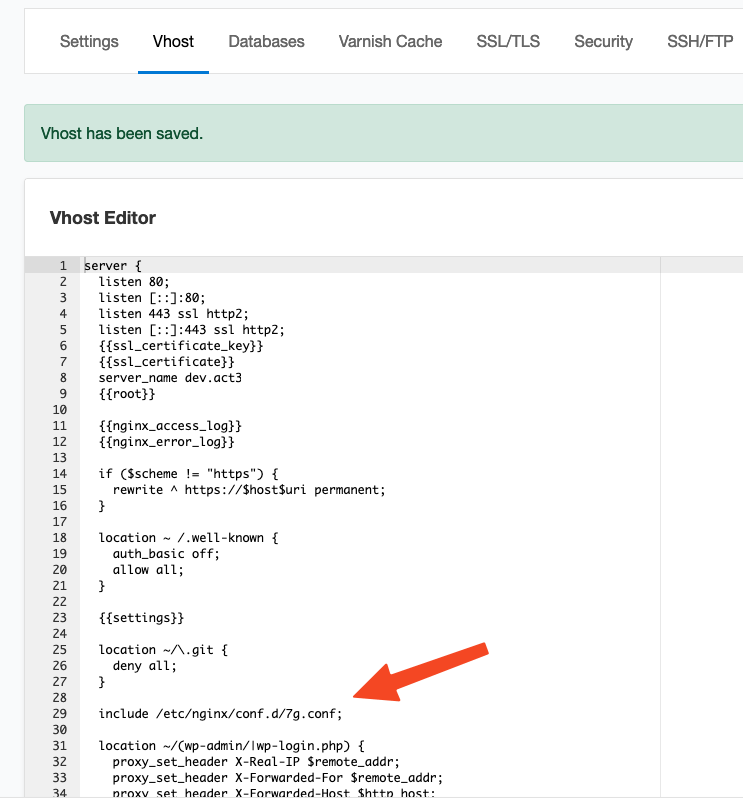
Save the file, CloudPanel will check for any syntax errors and not allow you to save until fixed.
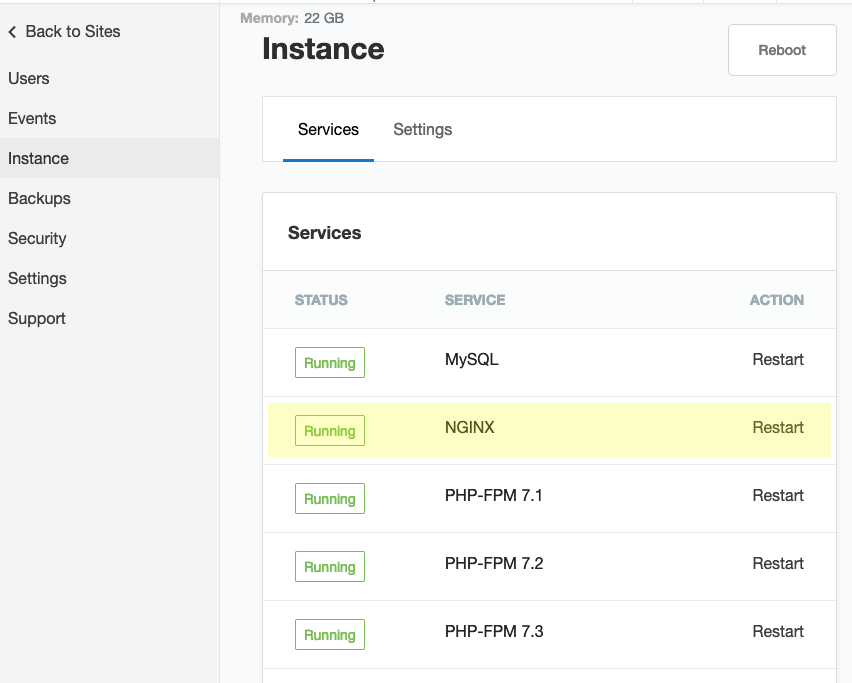
Restart NGINX either via CloudPanel or command line.
systemctl restart nginx
Test 7G Firewall
On a site you have enabled the 7G firewall test by going to:
https://mywebsite.com/fullclick
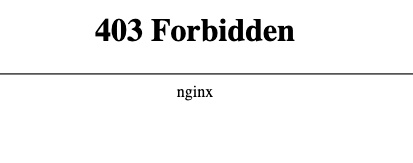
And you should see a 403 NGINX error.
That’s it – 7G WAF, up and running.








6 comments
Asparuh Soyanov
Hi,
Thanks for the great tutorial!
I’ve been using 7G Firewall since yesterday and everything was fine. But today I found that I can’t upload any images from my admin panel (OpenCart). This error appears: https://prnt.sc/cB3xzK3FqErO
A padding to disable MISE and Chrome friendly error page
When I disable the 7G Firewall everything work!
Could you advise me how to fix it?
Neil Gowran
What does the nginx error log say when this happens – log is at /home/username/logs/nginx/error.log
ar
Could you write a manual on how to install the Nginx Ultimate Bad Bot Blocker in CloudPanel? Alternatively, do you have any tutorial or links you could share? Thank you.
Neil Gowran
I would just stick with 7G as it deters bad bots – don’t really need another one on top of that.
Dima
You are the King. Thanks.
Can you write please the manual: How to limit access to wp-admin by IP with Cloudpanel? (better not for each vhost, but in general config).
And maybe you can add in this manual how to turn on logs for 7g firewall?
Thank you for your work.
Neil Gowran
Logging for 7G WAF NGINX is currently not available from developer only in Apache version – for directory restrictive access have a look at these two URLS: https://community.hetzner.com/tutorials/restrict-access-by-ip-or-password-in-nginx and https://serverfault.com/questions/279517/nginx-restrict-directory-access-by-ip